Let's have your own I.F.O. with your favorite picture
Make a new bmp-file size in 256x256 or 512x512 and rename it.
Then put it into the same folder where the mqo-file is.
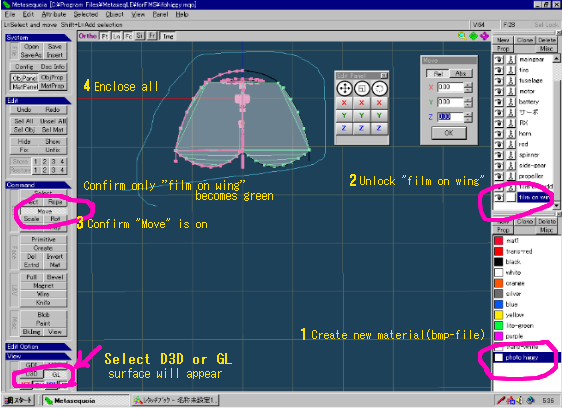
Open Metasequoia and load "ifohiggy" (I present this model for him)
This case is change the film from white-transparent to a picture.
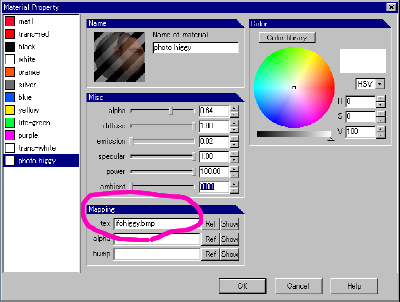
Off course you can change the color by editting ÅgMaterial PropertyÅh
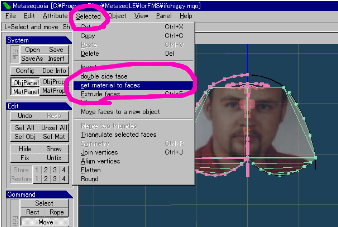
Change the film / selected > set materials to faces
ÅiWhen you map the texture and change the color on the face, make the Edit option [Pt], [Ln] and [Fc] ON Åj
Texture mapping is shown in the instruction that Mr. Sekiai wrote. ( Modeling for FMS with Metasequioa )
Notice
When you create a new material confirm the bmp-file name does not have some folder names (path) in the window ÅgtexÅh
You should make mqo-file and bmp-file in the same folder in the Metasequia folder to avoid error that the texture will disappear in FM S.
After you finish to change the film, output it as x-file (name it the new bmp-file's name) into MODELL folder.
Copy other folders ( par-file, wav-file) and rename them too.
You can see the work in the Modeling for FMS with Metasequioa